2022.04.01 최초 작성 후 수시로 추가/변경 중
한 번도 안 해본 사람은 있어도, 한 번 해본 사람은 없다는 롤꾸…!
내가 사용하는 것을 정리하는 겸, 괜찮아 보이는 걸 이것저것 모아보기로 했다.
▣ 컬러 추출하는데 유용한 프로그램 컬러 크롭(Color crop)
▣ 롤꾸에 사용할 수 있는 컬러 이름(영어)
https://www.w3schools.com/colors/colors_groups.asp
▣ 눈으로 보면서 CSS를 만들자(영어)
https://html-css-js.com/css/generator/
▣ 롤꾸 직접 만들기
https://danharu0920.tistory.com/142
Roll20 채팅로그 꾸미기 / 롤꾸 제작 방법
한 번도 안 해본 사람은 있어도, 한 번 해본 사람은 없다는 롤꾸…! 채팅로그 꾸미기, 흔히 롤꾸라 불리는 것들은 대개 글씨에 a 태그를 씌우고, 그것에 스타일을 입히는 겁니다. 즉. HTML과 CSS를
danharu0920.tistory.com
https://danharu0920.tistory.com/144
Roll20 채팅로그 꾸미기 / 롤꾸하는데 도움되는 CSS 모음
한 번도 안 해본 사람은 있어도, 한 번 해본 사람은 없다는 롤꾸…! 코딩…이라고 부르기는 뭐한 CSS를 조금만 익히면 롤꾸를 직접 만들거나, 개조하는데 무척 편해집니다. 본 글에서는
danharu0920.tistory.com
https://danharu0920.tistory.com/156
Roll20 채팅로그 꾸미기 / 롤꾸하는데 도움되는 HTML·CSS 모음 (심화)
한 번도 안 해본 사람은 있어도, 한 번 해본 사람은 없다는 롤꾸…! 코딩…이라고 부르기는 뭐한 HTML과 CSS를 조금만 익히면 롤꾸를 직접 만들거나, 개조하는데 무척 편해집니다. 본 글에
danharu0920.tistory.com
0. 기초
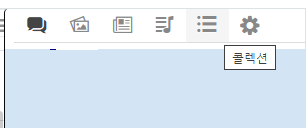
① 채팅로그 위쪽의 콜렉션 버튼 클릭
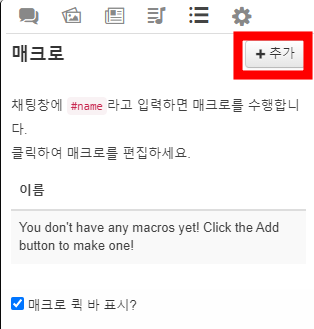
② 추가 버튼을 눌러 매크로 추가 시작 (새 이벤트 창이 열림)
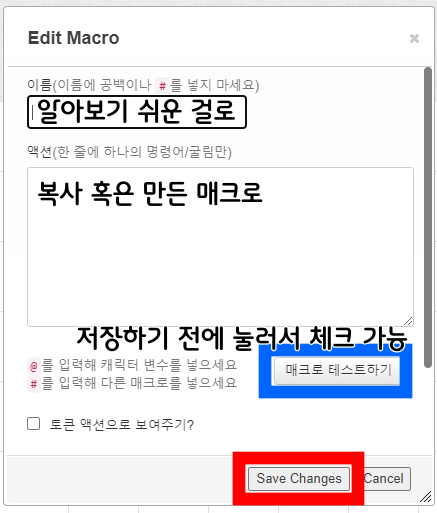
③ 매크로 만들기
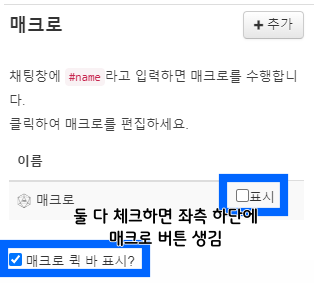
④ (선택) 매크로 퀵 바 만들기
**굵게** | *이탤릭체* | ***굵은 이탤릭체*** | ```roll20 코드 문자`` 또는 ``roll20 코드 문자``
1. AS / EM(AS) / DESC / 귓말(w)
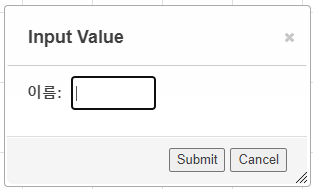
/as "?{이름|NPC1|NPC2|NPC3|NPC4}" [?{내용}](#"= style=" text-decoration: none; color: inherit;)
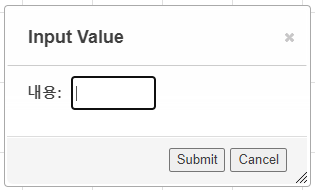
/em [?{내용}](#"= style=" text-decoration: none; color: inherit;)
/desc [?{내용}](#"= style=" text-decoration: none; color: inherit;)
/w "?{보낼사람 이름}" [?{내용}](#"= style=" text-decoration: none; color: inherit;)

위 4가지 매크로 하나로 합치기
/?{선택|em,em|as,as "?{이름}"|desc,desc|귓말,w "?{보낼사람}"} [?{내용}](#"= style=" text-decoration: none; color: inherit;)
 |
 |
 |
이름 부분을 비워놓으려면 스페이스바 눌러 공백 만들어놓기
/desc [?{내용}](#"style="text-decoration: none; color: inherit; font-style: normal)
/em [?{내용}](#" style="text-decoration: none; color: inherit; font-style: normal)
/emas " " [?{내용}](#"style="text-decoration: none; color: inherit; font-style: normal)

위 3가지 매크로와 ①의 /as 매크로, /w 매크로 합치기
/?{선택|em,em|emas,emas " "|as,as "?{이름}"|desc,desc|귓말,w "?{보낼사람}"} [?{내용}](#"= style=" text-decoration: none; color: inherit; font-style: normal)
(이름 부분을 비워놓으려면 스페이스바 눌러 공백 만들어놓기)
/emas " " [?{내용}](#"style="text-decoration: none; color: inherit; margin-left: -30px;)
똑바로 선 + 시작부분 맞춘 EMAS
/emas " " [?{내용}](#"style="text-decoration: none; color: inherit; font-style: normal; margin-left: -30px;)
/?{선택|em,em|emas,emas "?{이름}"|as,as "?{이름}"|desc,desc|귓말,w "?{보낼사람}"} [?{내용}](#" style=" text-decoration: none; color: inherit; font-style: normal; ?{선택2|emas " ",margin-left: -30px;|그 외,margin-left: 0px;})
 |
 |
2. 폰트 디자인 관련
[?{내용}](#"style="text-decoration: none; font-style: normal; color: ?{색상|})
응용 1: 특정 글자만 원하는 색상으로
[?{일반 1|}](#" style="text-decoration: none; color: inherit; font-style: normal)[?{색바꿀문자 1}](#" style="text-decoration: none; color: ?{색상값|red}; font-style: normal)[?{일반 2}](#" style="text-decoration: none; color: inherit; font-style: normal)
[?{색바꿀문자 숫자}](#" style="text-decoration: none; color: ?{색상값|}; font-style: normal)[?{일반 숫자}](#" style="text-decoration: none; color: inherit; font-style: normal)를 추가로 입력하여 매크로를 무한이 늘릴 수 있음
응용 2 : 폰트 반투명하게
[?{내용}](#" style="text-decoration: none; font-style: normal; color: rgba(?{글자색 rgb|0,0,0}, 0.2);)
[?{내용}](#" style="text-decoration: none; font-style: normal; vertical-align: top; color: ?{글자색|white}; background-color: ?{배경색|black}; display: ?{선택|inline-block|inline|block};)
여백을 없애고 싶으면 배경색 입히기 (중앙 정렬)을 참고할 것.
응용 3 : 판정 안내문
/desc [?{이름|}의 ?{기능 또는 특성|}?{선택|을|를} 판정하세요 🎲](#" style="text-decoration: none; font-style: normal; font-weight: bold; color: inherit; background-color: #dbd48e; border: 2px dotted #955150; border-radius: 20px; padding: 5px 20px; display: inline-block;)
[?{내용}](#" style="text-decoration: none; font-style: normal; color: ?{글자색|black}; display: inline-block; vertical-align: top; padding: ?{안쪽여백|0px}; border: ?{선 종류|1px solid black}; border-radius: ?{테두리 둥글게|0px}; box-shadow: ?{그림자|0px 0px 0px rgba(0,0,0,0)}; font-style: normal; font-weight: normal;)
응용 4 폰트 테두리 / 그림자 활용
/desc [?{이름|}의 ?{선택|이성|정신력}을 판정하세요.](#" style="text-decoration: none; font-style: normal; font-weight: bold; color: white; text-shadow: 2px 2px 2px #00FF9F, 2px -2px 2px #001EFF, -2px -2px 2px #D600FF, 2px 2px 10px #000000, 2px 2px 10px #000000;)
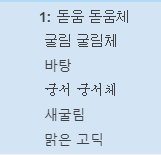
※ Roll20이 공식적으로 지원하는 한글 폰트는 없다. 영문 폰트도 4개 밖에 안 되고…
그런데 몇몇 한글 폰트가 Roll20에 먹힌다.
궁서(체), 돋움(체), 바탕(체), 굴림(체), 새 굴림, 그리고 맑은 고딕을 확인했다.
 |
 |
그 외의 한글 폰트를 사용할 경우 채팅로그에서는 확인이 안 되고, 백업했을 때에 확인할 수 있을 듯하다.
(물론 해당 폰트를 백업한 사이트가 지원한다는 가정하에.)
[?{내용}](#"style="text-decoration: none; font-style: normal; color: inherit; font-family: ?{폰트이름|}; text-shadow: ?{그림자|0px 0px 0px rgba(0,0,0,0)};)
응용 5: 검정+빨강(그림자)+궁서
https://danharu0920.tistory.com/153


[?{내용}](#"style="text-decoration: none; font-style: normal;color: rgba(0,0,0,0); text-shadow: 1px 1px 15px black;)
[?{내용}](#"style="text-decoration: none; font-style: normal; color: ?{색상|black}; background-color: ?{색상|};)
3. 링크 / 이미지(링크형태&이미지만) 넣기
[?{로그에 표시할 문구}](?{링크주소} #"style="text-decoration: underline; font-style: normal; color: inherit;)
응용 1 : BGM 링크 연결
(출처: https://li-xx.tistory.com/16에서 BGM 제목이 길어지더라도 디자인 안 깨지게)
(한글은 거의 완벽하게 적용 됨. 영어 등 타 언어와 숫자는 깨질 수 있음)
/desc <div style="][ ](style="display: table;)[♬](#" style="vertical-align: middle;text-decoration: none; font-style: normal; font-weight: normal; font-size: 15px; color: ?{색상1|salmon}; padding: 5px; display: table-cell;)[Now Playing…](#" style="vertical-align: middle;text-decoration: none; font-style: normal; font-weight: normal; color: ?{색상2|#fa8072}; margin-right: 4px; opacity: 0.5; font-size: 12px; display: table-cell; min-width: 83px;)[?{제목|BGM제목}](?{URL|BGM링크} " style="text-decoration: none; font-style: normal; font-weight: normal; border: 1px solid ?{색상1|}; border-radius: 14px; padding: 3px 8px 2px 8px; color: ?{BGM 제목색|black}; font-size: 12px; background: white; box-shadow: 3px 3px 0px ?{색상2|}; display: table-cell;)
※ 색상 1 : 음표, 상자 테두리 / 색상 2 영문, 상자 그림자
/desc <table style="][ ](style="table-layout: fixed; font-size: 11px; font-family: 'Pictos Custom', 'Noto Sans KR'; color: ?{BGM 제목, 버튼색|black}; background: white; text-align: center; display: inline-block; padding: 5px 15px; font-style: normal; font-weight: normal; border-radius: 20px; text-decoration: none; border: 1px dashed ?{테두리색|palevioletred}; box-shadow: 2px 2px 0 ?{그림자색|lightpink};)<tr style="][ ](style=")<td style="][ ](style=")[💿 ](?{BGM url}" style="text-decoration: none; display: block;)<td style="][ ](style="width: auto;)[?{BGM제목|}](?{BGM url}" style="text-decoration: none; display: block;)<td style="][ ](style="width: 51px;)[ ▶ ■](?{BGM url}" style="text-decoration: none; display: block;)
[?{alt}](?{링크주소}#.png) 또는 <img src="?{링크주소}" style="][ ](style="vertical-align: text-top;")
차이: 전자는 링크주소로 이동 가능 / 후자는 불가

응용 2 : 이미지 크기 조절하는 매크로
<img src="?{링크주소}" style="][ ](style="vertical-align: text-top; width: ?{이미지 너비|100px};")

응용 3 : 이미지 중앙 정렬 매크로
<div style="][ ](style="text-align: center;)<img src="?{이미지링크|}" style="][ ](style="display: inline-block;)

4. 디자인 가능한 표
Roll20은 &{template:default} {{name=표 이름}} {{표 내용 1=표 내용 구분 1}}라는 표 매크로를 제공하고 있다.
하지만 이 매크로는 수정이 거의 불가능하다고 봐야한다.
그래서 해당 표 매크로를 대체할 수 있는 롤꾸 가능 표 매크로를 만들어 보았다.
<table style="][ ](style="background-color: ?{표 배경색|white}; width: 100%)<caption style="][ ](style="background-color: ?{표 제목 배경색|#702082}; padding: 5px;)[?{표 이름}](#" style="border: 1px solid ?{표 제목 테두리색|rgba(0,0,0,0)}; color: ?{표 제목 글자 색|white}; font-size: 1.1em; font-style: normal; text-decoration: none; font-weight: bold; text-align: ?{제목 정렬|center}; display: block;)<tr style="][ ](#" style="border: 1px solid ?{표 테두리색|black};)<td style="][ ](style="min-width: 50px; padding: 5px;)[?{표 내용 1}](#" style="text-decoration: none; font-style: normal; font-weight: bold; color: ?{표 내용 1 글자색|inherit}; text-align: ?{내용 정렬|left|right|center}; display: block;)<td style="][ ](style="padding: 5px;)[?{표 내용 구분 1}](#" style="text-decoration: none; font-style: normal; color: {표 내용 구분 1 글자색|inherit}; text-align: {내용 구분 정렬|left|right|center}; display: block;)
표의 행를 추가하고 싶으면, 아래 코드를 알맞게 변경하여 매크로에 추가
<tr style="][ ](#" style="border: 1px solid ?{표 내용 테두리색|};)<td style="][ ](style="min-width: 50px; padding: 5px;)[?{표 내용 `숫자`}](#" style="text-decoration: none; font-style: normal; font-weight: bold; color: ?{표 내용 `숫자` 글자색|}; text-align: ?{내용 정렬|}; display: block;)<td style="][ ](style="padding: 5px;)[?{표 내용 구분 `숫자`}](#" style="text-decoration: none; font-style: normal; color: ?{표 내용 구분 `숫자` 글자색|}; text-align: ?{내용 구분 정렬|}; display: block;)`숫자` 부분에 들어가는 것 : 2, 3(다음행), 4(그 다음행), …
5. 배경색 입히기 (중앙 정렬)
/desc <div class="box" style="][ ](style="background-color: ?{배경색|#85AF4B}; text-align: center; margin: -9px -15px -7px; padding: 9px 15px 7px 10px; border-top: 2px solid ?{위쪽 테두리색|#476a30};)[?{내용|}](#" style="text-decoration: none; font-style: normal; color: ?{글자색|inherit}; display: block; font-weight: ?{글자 두께|bold};)
위 매크로를 포함한 채팅 로그를 백업할 때에는…
<div class="textchatcontainer" id="textchat"> 부분을 찾아서 > 앞에 style="overflow: hidden" 추가
<div class="textchatcontainer" id="textchat" style="overflow:hidden">
6. 핸드폰 문자 메시지 (기준 PL)
보내기
<div style="][ ](style="text-align: right)[?{😉|AM|PM}](#" style="text-decoration: none; font-style: normal; color: inherit; display: inline-block; font-size: 10px;) [?{시간|}](#" style="text-decoration: none; font-style: normal; color: inherit; font-size: 10px;) [?{내용}](#" style="text-decoration: none; font-style: normal; color: inherit; padding: 10px; background-color: #fdec33; border-radius: 15px 0% 15px 15px; margin-right: 10px; display: inline-block;)
받기
<div style="][ ](style="text-align: left)[?{😉|AM|PM}](#" style="text-decoration: none; font-style: normal; color: inherit; display: inline-block; font-size: 10px;) [?{시간|}](#" style="text-decoration: none; font-style: normal; color: inherit; font-size: 10px;) [?{내용}](#" style="text-decoration: none; font-style: normal; color: inherit; padding: 10px; background-color: #fff; border-radius: 0% 15px 15px 15px; margin-right: 10px; display: inline-block;)
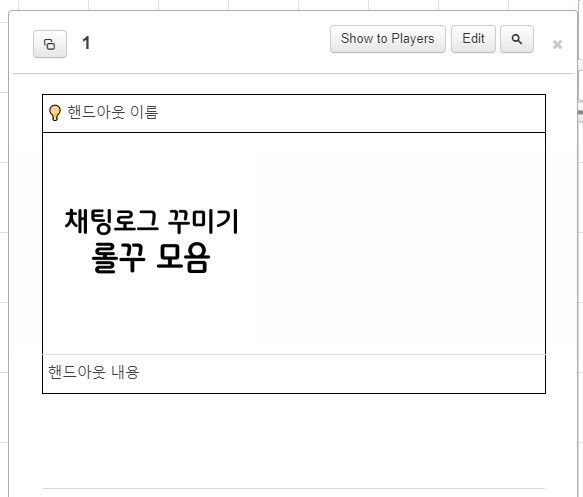
7. 핸드아웃
<table style="][ ](style="background-color: #fff; width: 100%)<caption style="][ ](style="border: 1px solid black; border-bottom: 4px double black; font-style: normal; background-color: #fff; padding: 5px;)[💡 ?{핸드아웃 이름}](#" style="color: inherit; font-size: 1.1em; text-decoration: none; font-weight: bold; text-align: left; display: block;)<tr style="][ ]( )<td class="tdImg" style="][ ](style="line-height: 0px; border: 1px solid black; border-bottom: none; border-top: none;)[ ](?{이미지|없음,#|있음,?{이미지주소}})<tr style="][ ]( )<td style="][ ](style="border: 1px solid black; border-top: none; padding: 5px;)[?{핸드아웃 내용}](#" style="text-decoration: none; font-style: normal; color: inherit; text-align: left; display: block;)
※ 이미지가 표에 너무 딱 달라붙는다
→ class="tdImg" style="][ ](style=" 뒤에 margin: 원하는 여백값; 추가
※ 이미지 중앙 정렬
→ class="tdImg" style="][ ](style=" 뒤에 text-align: center; 추가
둘 다 하고 싶으면 추가값을 나란히 적으면 됨.
예쁜 핸드아웃 모음 : https://danharu0920.tistory.com/155
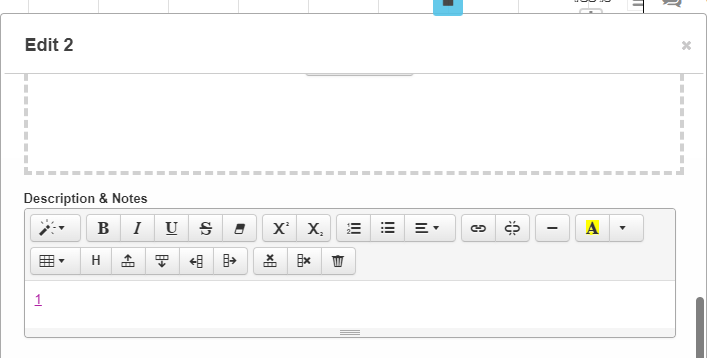
8. 클릭하면 Handouts가 열리는 핸드아웃
① Handouts에 원하는 핸드아웃을 만든다.
② Handouts에 임시 핸드아웃을 만들고, Description & Notes에 [①의 이름]을 적고, 저장.
(여기까지만 하면 Handouts의 링크를 누르면, 다른 handouts이 열린다.)
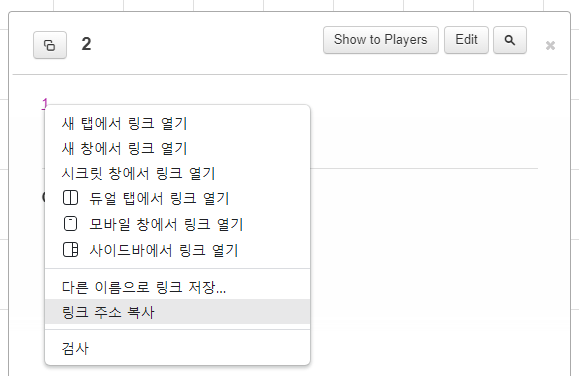
③ 채팅창에 아래 매크로 복사, 붙여넣기
<table style="][ ](style="background-color: #fff; width: 100%)<caption style="][ ](style="border: 1px solid black; border-bottom: 4px double black; font-style: normal; background-color: #fff; padding: 5px;)[💡 ?{핸드아웃 이름}](?{복사한 링크|}" style="color: inherit; font-size: 1.1em; text-decoration: none; font-weight: bold; text-align: left; display: block;)<tr style="][ ]( )<td class="tdImg" style="][ ](style="line-height: 0px; border: 1px solid black; border-bottom: none; border-top: none;)[<img src="?{이미지|있음,?{링크주소|}|없음,#}")](?{복사한 링크|}" style=")<tr style="][ ]( )<td style="][ ](style="border: 1px solid black; border-top: none; padding: 5px;)[?{핸드아웃 내용}](?{복사한 링크|}" style="text-decoration: none; font-style: normal; color: inherit; text-align: left; display: block;)
④ 임시 핸드아웃에 생긴 링크 복사 후, input "복사한 링크"에 붙여넣기
⑤ ↓ 결과물 ↓
9. 채팅창 다이스
(출처 : https://t-l-pg.postype.com/post/11588401 )
일반 주사위
/as "?{이름}" &{template:coc-1}{{name=?{기능}}}{{success=[[?{기능치}]]}}{{hard=[[floor(?{기능치}/2)]]}}{{extreme=[[floor(?{기능치}/5)]]}}{{roll1=[[1d100]]}}
보너스·패널티 주사위
/as "?{이름}" &{template:coc}{{name=?{기능}}}{{success=[[?{기능치}]]}}{{hard=[[floor(?{기능치}/2)]]}}{{extreme=[[floor(?{기능치}/5)]]}}{{roll1=[[1d100]]}}{{roll2=[[1d100]]}}{{roll3=[[1d100]]}}
무기(공격) 주사위
/as "?{이름}" &{template:coc-attack-1}{{name=?{무기이름}}}{{success=[[?{기능치}]]}}{{hard=[[floor(?{기능치}/2)]]}}{{extreme=[[floor(?{기능치}/5)]]}}{{roll1=[[1d100]]}}{{damage=[[floor(?{무기대미지|}+?{대미지보너스|})]]}}
10. 귓말처럼 생겼지만 모두에게 보임! (GM 전용)
/desc <div class="box" style="][ ](style="display: block; background-color: #f2f5d3; border-top: 2px solid #f0f092; margin: -9px -15px -7px; padding: 9px 15px 7px 10px;)<table style="][ ](style=")<tr style="][ ]( )<td class="avatar" style="][ ](style="width: 28px; padding: 0px;)<img src="?{이미지|생략,#|넣기,?{url}}" style="][ ](style="width: 28px; position: absolute; top: 4px; left: 5px;)<td style="][ ](style="text-align: left; padding: 0px; padding-left: 5px)[(From ?{보내는 사람 이름|})](#" style="text-decoration: none; font-style: normal; color: inherit;)[?{내용}](#" style="text-decoration: none; font-style: normal; color: inherit; font-weight: normal;)

위 매크로를 포함한 채팅 로그를 백업할 때에는…
<div class="textchatcontainer" id="textchat"> 부분을 찾아서 > 앞에 style="overflow: hidden" 추가
<div class="textchatcontainer" id="textchat" style="overflow:hidden">
11. 체력바
참고: https://wady-6ox.tistory.com/221
calc 속성값을 막아놓은 롤20 때문에 아래 매크로들을 차례로 입력해야 함.
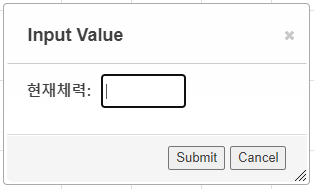
① /w gm n=[[(?{현재체력}/?{초기체력})*100]]
①은 GM이, ② 매크로에 꼭 필요한 n값을 편하게 구하게 해줄 뿐이기 때문에 필수 매크로는 아님.
채팅로그 등에 ①이 남아있기를 원하지 않는 경우, 계산기 등으로 n값(현재체력/초기체력*100)을 구하면 됨.
②
/desc ?{체력| 100%,[?{현재체력} (100%)](#" style="font-style: normal; color:#ffffff; border:1px solid black; margin:0px;text-align:center;user-select:none;display:block;padding:2px;text-decoration:none;background-color: #C9151E)|n%,[?{현재체력} (?{n}%)](#" class="broken" style="font-style: normal; color:#ffffff; border:1px solid black; margin:0px;text-align:center;user-select:none;display:block;padding:2px;text-decoration:none;background-image: linear-gradient(to right, #C9151E ?{n}%, #000000 ?{n}%)|0%,[?{현재체력} (0%)](#" style="color:#ffffff; border:1px solid black; margin:0px;text-align:center;user-select:none;display:block;padding:2px;text-decoration:none;background-color: #000000)}
 |
 |
 |
소수값도 지원함.
단, 백업시 약 33% 확률로 깨지며, 깨질 경우 아래와 같이 대처
① HTML 모드로 들어가 class="userscript-broken" 찾기
<a class="userscript-broken" style="font-style: normal ; color: #ffffff ; border: 1px solid black ; margin: 0px ; text-align: center ; display: block ; padding: 2px ; text-decoration: none ; background-image: linear-gradient( to right , #C9151E 숫자% , #000000 숫자%">숫자 (숫자%)</a>② 해당 태그의 "> 바로 앞에 ) 추가
<a class="userscript-broken" style="font-style: normal ; color: #ffffff ; border: 1px solid black ; margin: 0px ; text-align: center ; display: block ; padding: 2px ; text-decoration: none ; background-image: linear-gradient( to right , #C9151E 숫자% , #000000 숫자%)">숫자 (숫자%)</a>
12. 여러가지 선택지
굵은 글씨 처리된 부분을 변경한 뒤 복붙해야 함
/desc <div style="][ ](style="border-radius: 20px; padding: 10px; text-align: center; background-color: #f2e2e0;)[?{질문|무엇을 할까?}](#" style="color: #dc7071; text-decoration: none; font-style: normal; margin-bottom: 5px; display: inline-block; font-size: 1.5em; line-height: 2.0em; font-weight: bold;)[선택지 ①](! [선택지 1 결과값](#" style="font-style: normal;) " style="color: #000; display: block; width: 80%; margin: 10px auto; background-color: #cec3d2; border: none; padding: 5px; text-decoration: none ; font-style: normal ; ) [선택지 ②](! [선택지 2 결과값](#" style="font-style: normal;) " style="color: #000; display: block; width: 80%; margin: 10px auto; background-color: #cec3d2; border: none; padding: 5px; text-decoration: none ; font-style: normal ; ) [선택지 ③](! [선택지 3 결과값](#" style="font-style: normal;) " style="color: #000; display: block; width: 80%; margin: 10px auto; background-color: #cec3d2; border: none; text-decoration: none ; font-style: normal ; padding: 5px; )
선택지 추가하기 (굵은 글씨를 변경)
[선택지](!&#13;&#47;desc &lbrack;클릭하면 나오는 말&rbrack;&#40;&#35;&quot; style=&quot;font-style: normal;&#41; " style="color: #000; display: block; width: 80%; margin: 10px auto; background-color: #cec3d2; border: none; text-decoration: none ; font-style: normal ; padding: 5px; )
/desc [?{질문|어떤 것을 살펴볼까?}](#" style=" text-decoration: none; font-style: normal; color: inherit; font-weight: bold; display: block; margin-bottom: 7px;)<div style="][ ](style="display: table; table-layout: fixed; margin: 0 auto; width: 100%")[단서1](! [단서 1에 대한 설명](#" style="font-style: normal;) " style="text-decoration: none; font-style: normal; display: table-cell; color: white; border: 2px solid #834a42; border-radius: 10px; background-color: #cdab81; padding: 5px; font-weight:bold; ; text-align: center; display : table-cell)[ ](#" style="width: 4px; display: table-cell;)[단서2](! [단서 2에 대한 설명](#" style="font-style: normal;) " style="text-decoration: none; font-style: normal; display: table-cell; color: white; border: 2px solid #8e8b5b; border-radius: 10px; background-color: #b6c1b4; padding: 5px; font-weight:bold; ; text-align: center;; display : table-cell)[ ](#" style="width: 4px; display: table-cell;)[단서3](! [단서 3에 대한 설명](#" style="font-style: normal;) " style="text-decoration: none; font-style: normal; display: inline-block; color: white; border: 2px solid #834a42; border-radius: 10px; background-color: #cdab81; padding: 5px; font-weight:bold; text-align: center; display : table-cell;)
선택지 추가하기 (굵은 글씨를 변경)
[ ](#" style="width: 4px; display: table-cell;)[선택지](! [선택지에 대한 설명](#" style="font-style: normal;) " style="text-decoration: none; font-style: normal; display: inline-block; color: white; border: 2px solid #834a42; border-radius: 10px; background-color: #cdab81; padding: 5px; font-weight:bold; text-align: center; display : table-cell;)
/desc <div style="][ ](style="border: 6px solid #31a7e2; border-bottom: 20px solid #31a7e2; border-radius: 10px; max-width: 519px; padding: 5px; margin: 0 auto;)<table style="][ ](style="width: 100%;)<tr style="][ ](style=")<td style="][ ](style="background-color: #eeeeee; width: 27%; padding: 5px;)<img src="?{프사|있음,?{링크|}|없음,#}" style="][ ](style="margin:10px 0px -5px; min-height: 30px; width: ?{프사`|있음,37%;|없음,0px})[?{이름|}](#" style="display: block; width: 80%; background-color: #888888; border-radius: 10px; color: white; padding: 2px; margin: 0 auto; text-decoration: none; font-style: normal; font-weight: normal; vertical-align: top;)<td style="][ ](style="background-color: white; padding: 5px;)[?{질문}](#" style="text-decoration: none; font-style: normal; font-weight: normal; vertical-align: top; color: inherit; display: block;)[▶ 답1](! 답변1" style="text-decoration: none; font-style: normal; font-weight: normal; vertical-align: top; color: inherit;display: block; text-align: left; padding: 0; background-color:rgba(0,0,0,0); font-size: 10px;)[▶ 답2](! 답변2" style="text-decoration: none; font-style: normal; font-weight: normal; vertical-align: top; color: inherit;display: block; text-align: left; padding: 0; background-color:rgba(0,0,0,0);; font-size: 10px;)[▶ 답3](! 답변3" style="text-decoration: none; font-style: normal; font-weight: normal; vertical-align: top; color: inherit;display: block; text-align: left; padding: 0; background-color:rgba(0,0,0,0); font-size: 10px;)
선택지 추가하기 (굵은 글씨 변경)
[▶ ?{선택지}](!&#13;선택지 눌렀을 때 나오는 말 " style="text-decoration: none; font-style: normal; font-weight: normal; vertical-align: top; color: inherit;display: block; text-align: left; padding: 0; background-color:rgba(0,0,0,0&#41;; font-size: 10px;)
13. As: 변경 없이 NPC 대사 입력하기 (프사 포함)
볼드체 부분을 사전에 입력한 뒤 사용해야 함
npc가 1명일 때 : /as "npc이름" [?{내용}](#" style="text-decoration: none; color: inherit; min-height: 26px;) <div style="][ ](style="display: ?{순서|첫대사,inline-block|이후대사,none}; position: absolute; width: 28px; height: 28px; top: 4px; left: 5px;)<img src="프사링크" style="][ ](style=")
 |
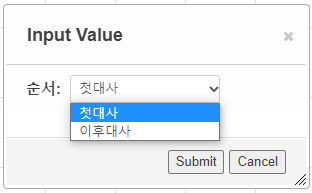 |

npc가 n명일 때 : /as "?{npc이름|npc1,npc1이름|npc2,npc2이름|npc3,npc3이름|npc4,npc4이름}" [?{내용}](#" style="text-decoration: none; color: inherit; min-height: 26px;) <div style="][ ](style="display: ?{순서|첫대사,inline-block|이후대사,none}; position: absolute; width: 28px; height: 28px; top: 4px; left: 5px;) <img src="?{📷|npc1,npc1프사링크|npc2,npc2프사링크|npc3,npc3프사링크|npc4,npc4프사링크}" style="][ ](style=")
 |
|
|
 |

여기서부터 수정 시작
기타
[( ∈ ⊙_________ ⊙)∋ oO(우럭!)](#" style="text-decoration: none; font-style: normal; font-weight: bold; vertical-align: top; color: #000; text-shadow: -1px 1px 0px #cad1a8, -2px 2px 0px #68723c)
플레이 도중 한 실수를 백업 시, 빠르게 찾아 지우기 위해 책갈피처럼 씀
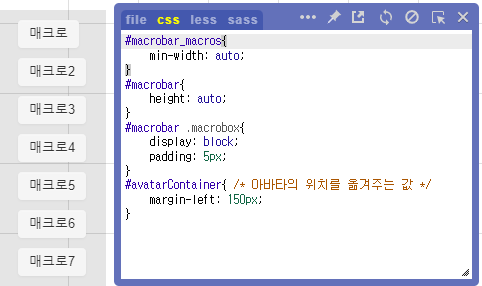
매크로 퀵바 세로로 쌓기 · 주크박스 바깥으로 빼기

'ORPG&Roll20' 카테고리의 다른 글
| 티스토리 티알 로그백업 : 새 에디터에 롤20 채팅로그 반영하기 (0) | 2025.02.07 |
|---|---|
| Roll20 채팅로그 꾸미기 / 롤꾸하는데 도움되는 HTML·CSS 모음 (심화) (0) | 2022.04.28 |
| Roll20 채팅로그 꾸미기 / 롤꾸하는데 도움되는 CSS 모음 (0) | 2022.04.06 |
| Roll20 채팅로그 꾸미기 / 롤꾸 제작 방법 (0) | 2022.04.01 |


